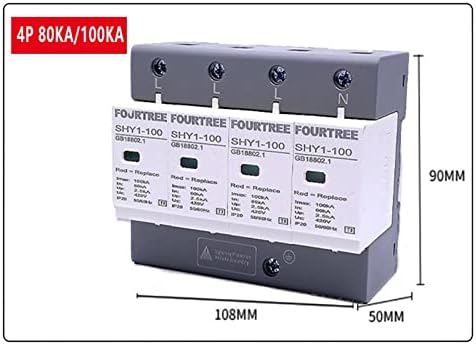
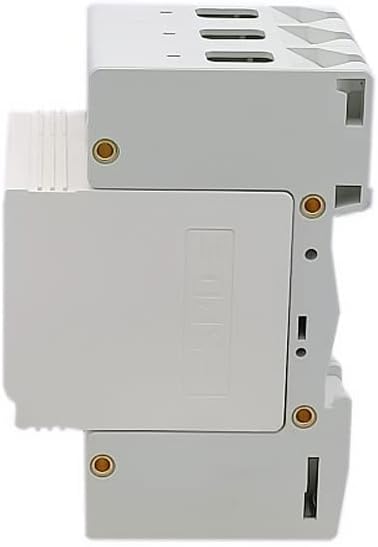
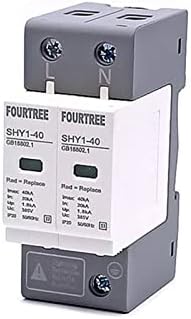
הגן על חשמל : ההתקנה פשוטה ונוחה לשימוש, המגן ביעילות במכשירי חשמל הקליפה עשויה ממעכב להבה למחשב; ניתן להשתמש במפסק של תיבת ההפצה. אפקט הגנת הרעמים : מנע את הסכנה של רעם, הגנה על בטיחות, תגובה מהירה, אפקט הגנה טוב על הרעם. חומרים איכותיים : שימוש בחומרים איכותיים, חזקים ועמידים, יש חיי שירות ארוכים. בשימוש נרחב : בשימוש נרחב בסדנאות, ארגזי ניטור חיצוניים, חברות, משקי בית, זה מתאים למערכת ייצור הסולארי האנרגיה החדשה, ומגן על זרם הברק המחובר לצינור, לזרם הברק הישיר או לגלוי מיידי אחר. הגן על חשמל : ההתקנה פשוטה ונוחה לשימוש, המגן ביעילות במכשירי חשמל. הקליפה עשויה ממעכב להבה למחשב; ניתן להשתמש במפסק של תיבת ההפצה. אפקט הגנת הרעמים : מנע את הסכנה של רעם, הגנה על בטיחות, תגובה מהירה, אפקט הגנה טוב על הרעם. חומרים איכותיים : שימוש בחומרים איכותיים, חזקים ועמידים, יש חיי שירות ארוכים. בשימוש נרחב : בשימוש נרחב בסדנאות, ארגזי ניטור חיצוניים, חברות, משקי בית, זה מתאים למערכת ייצור הסולארי האנרגיה החדשה, ומגן על זרם הברק המחובר לצינור, לזרם הברק הישיר או לגלוי מיידי אחר. מפרט : SHY3-PV מערכת חשמל סולארית. חיבור/יציאה מכשיר מגניב סגנון . הקולר של החלון הגלוי מראה מצב הפעלה . הגנה כפולה של חום יתר וזרם יתר . יש את האביזר של ממשק איתות REMOTs, יכול להיות שלט רחוק. הוראות התקנה : 1. עליכם לנתק את אספקת החשמל. אל תפעל במדינה הטעונה . אנו מציעים כי יש לחבר נתיך או מפסק אוטומטי בסדרה לפני המודול העמיד ברק . בהתקנה, אנא התחבר לתרשים ההתקנה, כפי שמוצג בתרשים, "+" מייצג את חוט האנודה ",-" מציג את חוט הקתודה, PE מייצג את חוט ההארקה, החיבור הלא נכון אינו ניתן להשהיה.
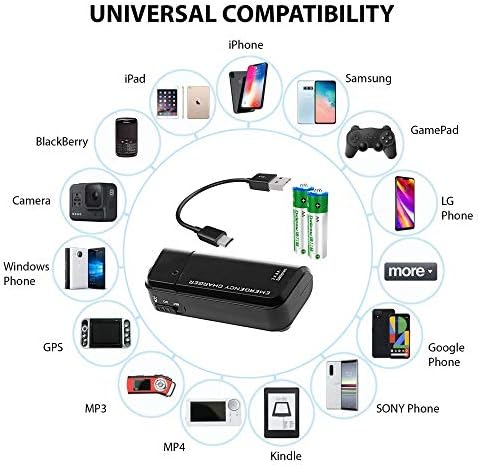
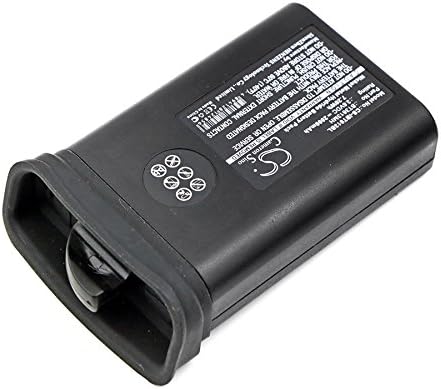
סוללה נטענת HQRP®;4 וולט; קיבולת : 800 ש"ח; Nimh ; שמור על קשר עם חברים ובני משפחה ולעולם לא להחמיץ שיחה; תואם לסול�
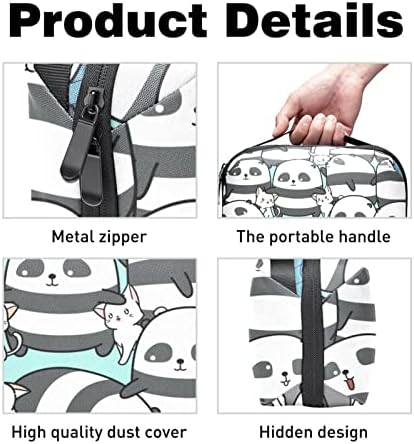
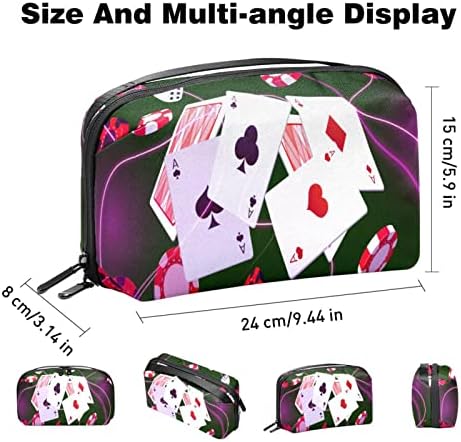
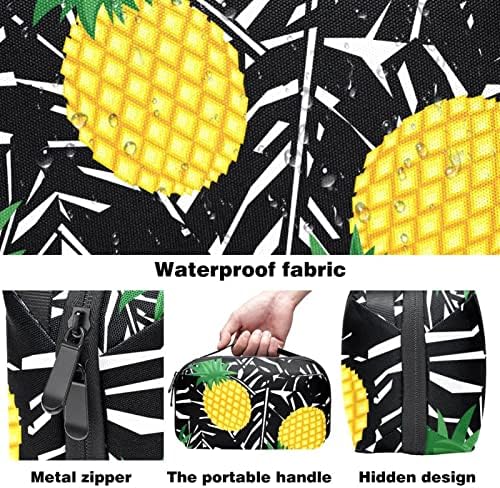
✅ מארגן מטען גודל : 15x24x8 ס"מ / 5 ✅ חומר מארגן נסיעות : מארגן אלקטרוניקה עשוי מחומר בד אוקספורד מוצפן 900 D...
★ גודל מארגן אלקטרוני אלקטרוני : 514 אינץ ' / 15x24x8 ס"מ ★ חומר מארגן אלקטרוניקה : שקית אחסון אלקטרונית עשויה מ
✅ מארגן מטען גודל : 15x24x8 ס"מ / 5 ✅ חומר מארגן נסיעות : מארגן אלקטרוניקה עשוי מחומר בד אוקספורד מוצפן 900 D...
★ גודל מארגן אלקטרוני אלקטרוני : 514 אינץ ' / 15x24x8 ס"מ ★ חומר מארגן אלקטרוניקה : שקית אחסון אלקטרונית עשויה מ
עשויים מבד אצטט לבן מט ב12, סמני תיל מסדרת ה אלה עמידים בפני שמן וחום, מה שהופך אותם למושלמים לעמידה במחזור
הגן על חשמל : ההתקנה פשוטה ונוחה לשימוש, המגן ביעילות במכשירי חשמל הקליפה עשויה ממעכב להבה למחשב; ניתן לה�
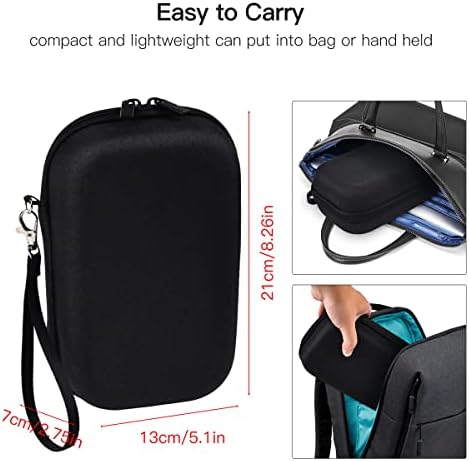
『תאימות רחבה』 המקרה הנייד האוניברסלי לא רק יכול לאחסן את בנק החשמל, כבלים, אוזניות, מתאם מחברים, עט, עיפר
מתגים מכשיר מגן מתח על Switches DC, הגנה מפני מתח נחשול ברק במערכת השמש (מערכת אספקת חשמל פוטו וולטאית)...
צבע : Outlet RJ45 תכונות : מתג אור מספר דגם : מתג קיר צבע : Outlet RJ45 תכונות : מתג אור מספר דגם : מתג קיר...
מתגים תעשייתיים / מתגי מתג מתגים תעשייתיים / מתגי מתג מתגים תעשייתיים / מכשיר מגן מתח מתח תעשייתי, מגני
עמיד למים חומרלא לדאוג את פריטים בתיק להירטב, שמירה על זה נקי ומסודר גבוההאיכות רוכסנים, חזק ועמיד, זה תי�
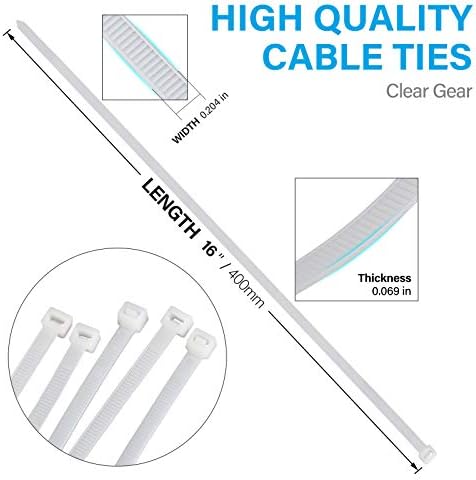
【פרטים】 אורך : 16 אינץ '(400 מ"מ), רוחב : 02 "(5 מ"מ), קוטר הצרור המקסימלי : 4.2" (106 מ"מ), 100 יחידות קשרי הרוכסן הלבנים �
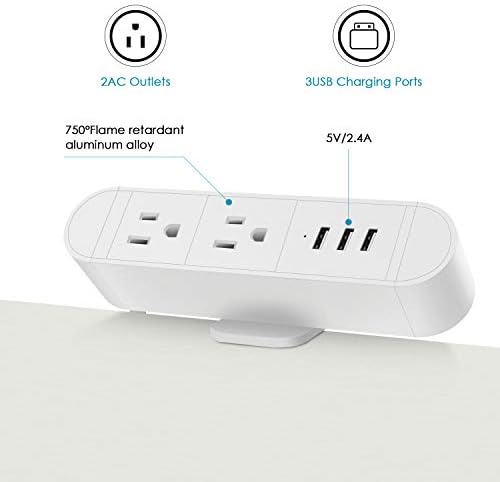
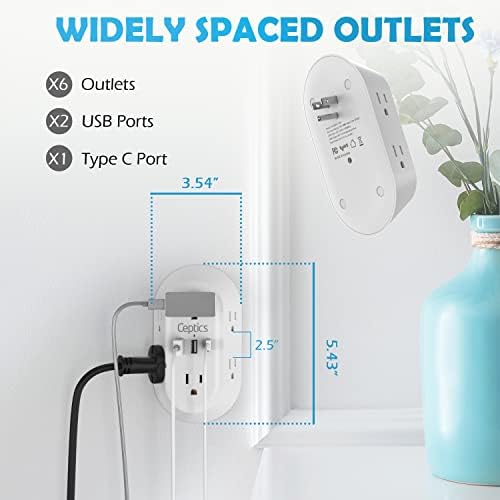
יש רק מוצא אחד זמין? 4 באחד רצועת חשמל קטנה זו כוללת 2 חנויות ו 2 יציאות USB, המציעות נוחות והגנה אולטימטיביי�
איכות מעולה גיבוי לכל החיים דירוג הגנת מתח 3600ג'ולג'ולס יותר פירושו הגנה רבה יותר! סינון רעש EMI / RFI מגן מפני
חומר באיכות גבוהה : קטעי כבל דבק XHF מיוצרים מ 3 מ 'דבק חזק וניילון PA66 בשימוש נרחב : כבל USB, כבל אתרנט, אורות מ
★ גודל מארגן אלקטרוני אלקטרוני : 514 אינץ ' / 15x24x8 ס"מ ★ חומר מארגן אלקטרוניקה : שקית אחסון אלקטרונית עשויה מ
חומר אטום למיםמארגן אלקטרוני נסיעות זה עשוי מבד אוקספורד מוצפן עמיד במים 900 D, העמיד ועמיד בפני שריטות מא�
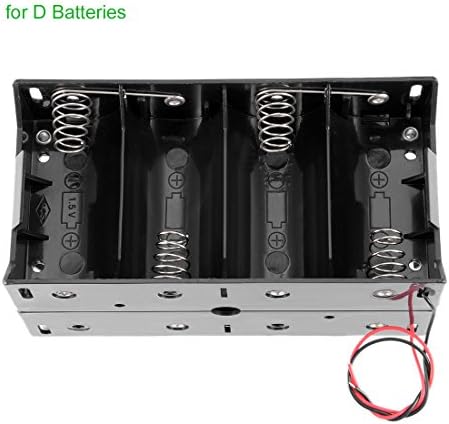
מחזיק תיבת מארז סוללות גנריות חדש עבור סוללה של 8 x 1 מוליכי תיל בגודל 5.9 אינץ 'לחיבור נוח ומהיר...
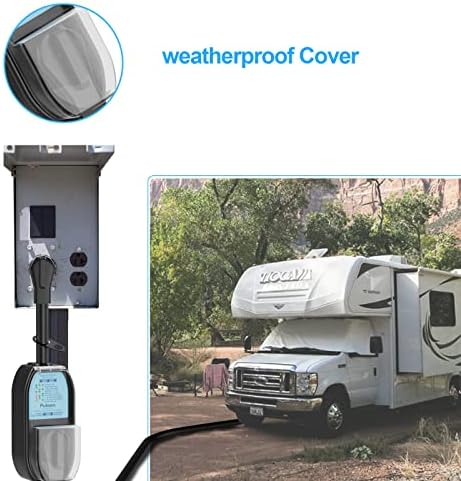
מגן נחשול RV 50 מנתח מעגלי AMP : אבחון LED מלא, גילוי קוטביות ניטרלית והפוכה פתוחה, אינדיקציה להדרכה שגויה, מחו�
Voicejoy RJ ל USB מתאם ל Plantronics CS500, CS510, CS520, CS530, CS540 אין צורך בכבלים וכונן נוסף אילם לרמקול ואילם למיקרופון בנפרד..
רצועת השולחן העבודה כוללת 2 שקעי חשמל ו 3 יציאות טעינה USB שמור על המחשבים הניידים, הטלפונים או מכשירי המחש�
[רב תכליתי] קשרי כבלים מחשב מתאימים לחוטי חשמל, כבלי שמע, כבלים, כבלי טלפון וכבלי כבלים ארגן כבלים סביב שו�
✅ מארגן מטען גודל : 15x24x8 ס"מ / 5 ✅ חומר מארגן נסיעות : מארגן אלקטרוניקה עשוי מחומר בד אוקספורד מוצפן 900 D...
עמיד למים חומרלא לדאוג את פריטים בתיק להירטב, שמירה על זה נקי ומסודר גבוההאיכות רוכסנים, חזק ועמיד, זה תי�
הגן על חשמל : ההתקנה פשוטה ונוחה לשימוש, המגן ביעילות במכשירי חשמל הקליפה עשויה ממעכב להבה למחשב; ניתן לה�
【דגם תואם למכונה】 מתאים ל ITOWA 1406008, זוכה, זוכה סדרתי 【דגם התאמת סוללה】 עבור מספר חלק מהסוללה : BT3613 MH...
דרכים עולמיות 6 יציאות USB של מתח חכם מקורקע לחלוטין ובטוח עם הגנת מתח קבצים מצורפים של SWADAPT תואמים אולטרה �
★ גודל מארגן אלקטרוני אלקטרוני : 514 אינץ ' / 15x24x8 ס"מ ★ חומר מארגן אלקטרוניקה : שקית אחסון אלקטרונית עשויה מ
בניית פוליאוריטן לכל מזג האוויר מודולרי שלובים עיצוב מחוזק צירים מכסה עבור קל כבל מיקום בניית פוליאוריט
★ גודל מארגן אלקטרוני אלקטרוני : 514 אינץ ' / 15x24x8 ס"מ ★ חומר מארגן אלקטרוניקה : שקית אחסון אלקטרונית עשויה מ
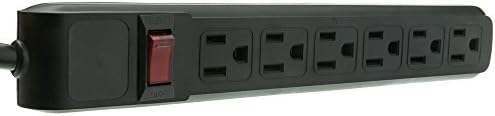
חיבור : 6 שקעים 3 שיניים חיבור : תקע חשמל בן 3 שיניים אחר : תקע מסתובב חיבור : 6 שקעים 3 שיניים חיבור : תקע חשמל �
חומר אטום למים אין לדאוג שהפריטים בתיק יירטבו, ישמרו עליו נקי ומסודר רוכסנים איכותיים, חזקים ועמידים, תי
חומר אטום למים אין לדאוג שהפריטים בתיק יירטבו, ישמרו עליו נקי ומסודר רוכסנים איכותיים, חזקים ועמידים, תי
סוג סוללה : liion, מתח : 200 V, קיבולת : 4000m Ah, WH : 80 דגמים תואמים : QM13809 ST20 מפוח עלים 2in1 20 V QM4 A6001 QM6001 QM3061 B QMT20 QM23802 QM3602
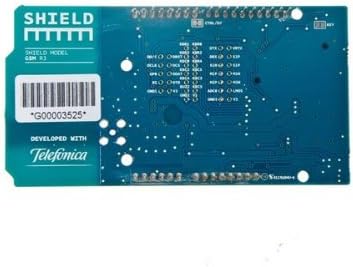
"מגן GSM תואם של Arduino עבור Mega Leonardo ADK תכונה : אפשר בפקודות תמיכה ב TCP / UDP ו HTTP GPRS DATAS DATCHLINK ו UPLINK מהירות העברה מ�
פועלת עם 20 מחיפים ו 125 פטרות מגיע עם רצועה מצופה ניקל וברגי הרכבה וברגי מסוף נירוסטה כדי להגן עליה מפני קו